|
|
|
Productos
|
|
Información
|
|
Destacado
|
|
|
 |
|
|
No hay comentarios de productos.
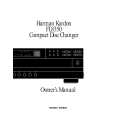
harman/kardon
Service bulletin # H/K9901 Rev1 November 2002 To: All harman/kardon Service Centers Models: FL8350/FL8550 Subject: �No disc� reading in display
Service Bulletin
Warranty Labor Rate: Major Repair
When a CD is in the carousel at the play position, Infra red light emitted by IR LED D3 is reflected onto IR Photo sensor D2. D3 and D2 are on the PCB located underneath the carousel. When the amount of IR light received by D2 is insufficient, D2 will not saturate and the display will read �No disc�. In the event you receive an FL8350 or FL8550 with the complaint: Display reads �No disc� but a disc is in the tray, perform the modification as listed below: 1) Lay the unit on a padded surface. 2) Remove the (7) Black Philips screws holding the Top Cover on; remove cover. 3) Lay unit on its side and remove (5) Black screws on bottom which hold front panel to chassis. 4) Lay unit upright, remove (2) Black screws at top front section holding front panel to the front tray retainer brackets. 5) Pull front panel away, cut plastic cable ties if necessary, and lay the front panel face down on the table. 6) Remove (4) tray retainer brackets, (1) Plated screw each. (Bracket on left side may have a ground terminal). 7) Pull the carousel tray up and out of the unit; turn upside-down to expose the sensor board. 8) Remove the (2) Plated screws holding the sensor board to tray. 9) Lift the board and unplug either molex connector CN1 or CN2 to be able to turn board upside-down. 10) Locate R1 and change from a 470W to a 750W resistor - h/k part# 1007-501316-000. 11) Locate R2 and change from a 750W to a 470W resistor - h/k part# 1004-701316-000. Alternately, the two above parts may just be �swapped�, as this will result in the correct values. 12) Locate D3 and replace with new infra-red LED - h/k part# 3100-204000-002.
REASSEMBLY: 13) Replace sensor board, screws, and CN1 or CN2 connectors. 14) Turn the carousel tray over and replace back in the track; tray must be positioned all the way at the rear of the unit. When placed correctly, tray should not glide back & forth on the track. 15) Replace and attach the (4) tray retainer brackets with single screws - ground wire (if present) is re-attached to left front bracket. 16) Replace the front panel, both with the (5) bottom screws and the (2) screws at the top. Note: Make sure any washers that were present between the various brackets and the chassis are reinstalled. Replace cable ties as necessary. 17) Test the player by inserting one or more compact discs, assure unit reads discs in all slots. 18) Locate MCU board, which is mounted vertically on right side of unit. Connect DC Multimeter to Pin 8 (gray wire) of CN705 (10 pin plug, labeled 'DSNS'), and Pin 2 (red wire) of CN701 (2 pin plug). While playing a disc, DC Multimeter reading must be between 4.7 V and 5.0 V. 19) Replace top cover and screws.
Model FL8350 FL8550 Serial number (120V) YC0001-01001 to YC0001-37014 YC0003-01001 to YC0003-08666 YC0001-37015 and above YC0003-08667 and above Serial number (230V) YC0002-01001 to YC0002-16673 YC0004-01001 to YC0004-04884 YC0002-16674 and above YC0004-04885 and above Status Needs Modification Action Replace: R1 with 750 W R2 with 470 W D3 Changed by factory NONE REQUIRED
FL8350 FL8550
20
|
|
|
> |
|